

|

Creating lab cases
After setting up the Lab Case Manager, you are ready to create lab cases for your patients.
To create a lab case
1. In the case list toolbar, click New Case.
The Select Patient dialog box appears.
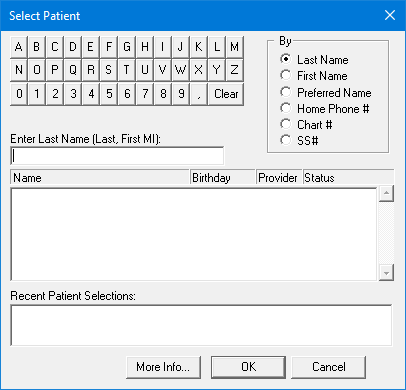
2. Select the appropriate patient, and then click OK.
The New Case dialog box appears.

3. Edit or enter the following information in the appropriate fields:
· Create Date - Defaults to the current date. If necessary, select a different date from the list.
· Provider - Defaults to the patient’s primary provider. If necessary, click the search button to change the provider.
· Category - From the list, select the lab treatment category that you want to assign this case to. To learn more, click Setting up labs.
4. Click the Procedure Information search button.
The Treatment Plan dialog box appears.

a. Select the appropriate code or codes to attach to the lab case.
b. Click OK.
Note: If the procedure does not appear in the Treatment Plan dialog box, enter treatment plan procedures from Treatment Plans.
5. To select shade information for the attached procedure code, click Shades.
The Shade Information dialog box appears, showing six anterior teeth.

a. To assign a shade, click a location on a tooth.
The Select Shade dialog box appears.

b. Select a shade guide and shade from their respective lists, and then click OK.
Note: To remove a shade from its location, select the shade, and then click Clear Selection.
6. From the New Case dialog box, do the following:
· Case Note
· Type a note, or click Custom Notes to select a custom case note from the list.
· Click Insert Dateline to insert the current date in the note.
· Enclosures
· Click the appropriate enclosure.
· Press the Ctrl key and click the additional enclosures to select more than one enclosure.
To learn more about adding enclosures, click Setting up enclosures.
· Send Information
-
Lab – Select the lab that the case has been or will be shipped to from the list.
To learn more about adding a lab, click Setting up labs.
· Shipping Method – Select a shipping method from the list.
To learn more about shipping methods, click Setting up shipping methods.
· Phone – Supplied automatically.
· Sent Date – Type the date that you sent the case to the lab.
The current date is the default. If appropriate, select a different date from the list.
· Try-in – Select to indicate a "try-in" lab case.
· Emergency – Select if the lab case is an emergency.
· Call Doctor – Select to flag notifying the doctor regarding the case.
· Shipping Tracking Number – Type the shipping tracking number for reference.
· Shipping Cost – Type the cost to ship the lab case.
· Information From Lab
· Lab Assigned Case # – Type the case number from the lab.
· Receive From Lab Date – Type the date that the case should be back from the lab.
If the lab is an online lab, Easy Dental enters the lab assigned case # and date automatically when you send the case electronically.
· Next Lab Appointment Information – Displays the patient's nest appointment date and time. If there is more than one appointment, click Change Appt, and then select the appointment associated with this lab case.
· Close Options
· Print Case – Prints the case on closing.
· Send Online – Sends the case electronically
7. Click OK.